
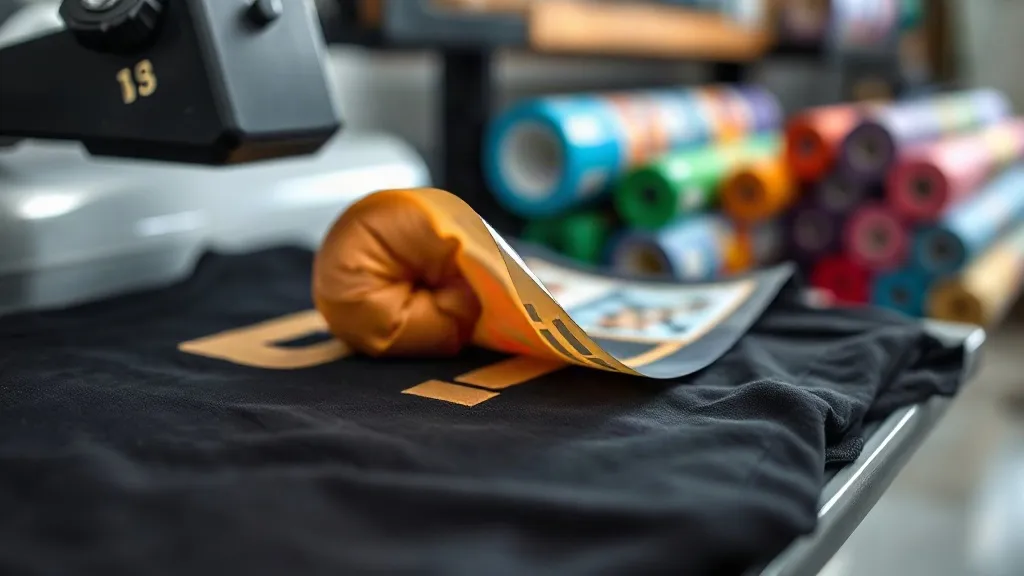
If you have ever tried to print a detailed design on a nylon jacket or a polyester jersey, you know the frustration: cracked vinyl, faded colors, or a plasticky feel that ruins the garment. That is exactly where dtf technology shines. Unlike traditional heat transfer vinyl or screen printing, DTF (Direct to Film) uses a special PET film and thermoplastic powder to bond vibrant, stretchable prints to almost any fabric. In this guide, I will walk you through the entire process, from how it works to pro-level application tricks, so you can decide if DTF is right for your next project.
What Are DTF Transfers and Why They Matter
At its core, a dtf transfers is a printed design on a special film that is then coated with a heat-activated adhesive powder. When you press it onto a garment, the powder melts and fuses the ink to the fabric fibers. The result is a soft, flexible print that stretches with the material and resists cracking. I remember my first DTF print on a 50/50 cotton-poly hoodie; after twenty washes, the colors were still bold and the edges sharp. That durability is why DTF has become a go-to for small shops and large decorators alike.
How DTF Printing Works: Step by Step
The process might sound technical, but once you see it in action, it is surprisingly straightforward. Here is what happens from digital file to finished garment.
1. Printing the Design
First, your artwork is printed onto a PET film using specialized DTF inks. These inks are pigment-based and include a white layer that acts as a base, allowing the colors to pop on dark fabrics. The printer lays down the colors in reverse order, then a white layer on top. This is why DTF can produce opaque prints on black or navy shirts without a separate white underbase.
2. Powdering and Curing
While the ink is still wet, the film passes through a powder shaker that applies a fine thermoplastic adhesive. Excess powder is shaken off, and then the film goes into a curing oven or under a heat source. The powder melts and forms a smooth, slightly tacky layer. This step is critical: under-curing leads to wash-off, while over-curing can make the transfer brittle. Most manufacturers recommend curing at around 160°C (320°F) for a few minutes, but always check your specific powder's datasheet.
3. Transferring to the Garment
Once cured, the film can be stored or immediately applied. You place it on the fabric, cover it with a protective sheet, and press. A heat press is ideal, but a home iron can work for small batches if you apply firm pressure. After pressing, you peel the film while it is still warm (or cold, depending on the film type). The ink and adhesive stay on the fabric, and the film comes away cleanly.
Why DTF Outperforms Other Methods on Difficult Fabrics
Not all fabrics are created equal. Cotton takes vinyl well, but synthetic blends, nylon, and even leather can be tricky. DTF excels because the adhesive bonds mechanically to the fibers rather than relying on a chemical reaction with a specific material. That means you can print on:
- 100% cotton, including ringspun and organic
- Polyester and poly-cotton blends
- Nylon and water-resistant fabrics
- Leather and faux leather
- Canvas and denim
I have personally used DTF on a waterproof rain jacket and a stretchy spandex leotard. The print stretched without cracking and survived multiple wash cycles. That versatility is a game-changer for anyone who decorates a variety of garments.
DTF vs. Other Printing Methods: A Quick Comparison
To help you choose, here is how DTF stacks up against common alternatives.
- Screen Printing: Cheaper for large orders of simple designs, but setup costs are high and it struggles with fine details and gradients. DTF has no setup fees and handles full-color images easily.
- Heat Transfer Vinyl (HTV): Great for single-color text and simple shapes, but layering multiple colors is time-consuming and the result can be thick. DTF prints are thinner and more detailed.
- Direct-to-Garment (DTG): Best for 100% cotton, but often looks faded on dark shirts and does not adhere well to synthetics. DTF works on both light and dark fabrics with equal vibrancy.
- Sublimation: Only works on polyester and requires light-colored material. DTF is not limited by fabric color or composition.
If you need small batches, complex designs, or prints on tough materials, DTF is often the most practical choice.
Getting Started: Tips for Flawless DTF Application
Even with great equipment, a few best practices can mean the difference between a professional-looking print and a peeling mess. Here is what I have learned from my own trials.
Choose the Right Film and Powder
Not all DTF films are created equal. Double-sided matte film tends to release better and reduces static. For the powder, finer particles (around 80-200 microns) give a softer hand feel. If you are printing on stretchy fabrics, look for a high-elasticity powder.
Master Your Heat Press Settings
Temperature, pressure, and time are your three levers. A good starting point is 160°C (320°F) for 15 seconds with medium pressure. But every press is different, so test with a scrap fabric. I keep a notebook with settings for each fabric type; it saves me from ruining expensive garments.
Peel at the Right Temperature
Most DTF films are cold-peel or warm-peel. Cold-peel means you wait until the transfer is completely cool before removing the film. Warm-peel means you remove it while it is still hot. Using the wrong method can cause the design to lift or leave residue. Always check the film's instructions.
Post-Press for Extra Durability
After peeling, I like to give the print a second press for 5 seconds with a protective sheet. This further embeds the adhesive and smooths out any texture. It is a small step that makes a big difference in wash resistance.
Common Mistakes to Avoid with DTF Transfers
Even experienced printers run into issues. Here are the most frequent pitfalls and how to sidestep them.
- Under-curing the powder: If the powder does not fully melt, the print will wash off. Invest in an infrared thermometer to check the actual temperature of the film.
- Too much pressure: Excessive pressure can cause the adhesive to squeeze out, leading to a halo effect around the design. Use medium pressure and adjust based on your press.
- Not pre-pressing the garment: Moisture in the fabric can create steam and prevent proper adhesion. Always pre-press for 5-10 seconds to remove wrinkles and moisture.
- Using the wrong side of the film: The ink side must face up when printing, and the powder is applied to the wet ink. If you reverse it, the transfer will not work.
By avoiding these mistakes, you will get consistent, professional results every time.
Frequently Asked Questions About DTF Transfers
Can I use DTF transfers on 100% polyester?
Yes, DTF works exceptionally well on polyester, including moisture-wicking and athletic fabrics. The key is to use a low temperature (around 140-150°C) and light pressure to avoid scorching or dye migration. Some polyester dyes can sublimate into the print, so choose a film with a dye-blocking layer if you are printing on dark colors.
How long do DTF prints last?
With proper application and care, DTF prints can last as long as the garment itself. I have shirts that have gone through 50+ wash cycles with no fading or cracking. To maximize longevity, wash inside out in cold water and avoid bleach or fabric softeners. Tumble dry low or hang dry.
Do I need a special printer for DTF?
You can convert an existing inkjet printer to use DTF inks, but it requires a bulk ink system and regular maintenance to prevent clogging. Alternatively, many suppliers offer DTF printing services where you send your artwork and receive ready-to-press transfers. For small businesses, outsourcing the printing can be more cost-effective than investing in equipment upfront.
What is the difference between DTF and DTG?
DTG (Direct-to-Garment) prints directly onto the fabric, while DTF prints onto a film that is then transferred. DTF adheres to more fabric types, produces more vibrant colors on dark garments, and has a softer feel after washing. DTG is limited mostly to cotton and often requires pre-treatment. For versatility, DTF is the winner.
Can I layer DTF transfers?
Yes, you can layer DTF transfers to create multi-color or multi-dimensional designs. Press the first layer, peel, then press the second layer on top. Use a lower temperature for subsequent presses to avoid disturbing the underlying layer. This technique is great for adding names or numbers to jerseys.
DTF technology has opened doors for decorators who need flexibility without sacrificing quality. Whether you are a hobbyist or a growing apparel brand, understanding the ins and outs of dtf transfers will help you deliver prints that customers love. Give it a try on your next tricky fabric, and you might never go back to traditional methods.