
Most people who get into custom apparel start the same way: a heat press, a stack of vinyl, and a growing pile of wasted material. Vinyl works fine for simple one-color names and numbers, but the moment a customer brings you a full-color logo with gradients and fine detail, the limitations show up fast. That is usually when DTF enters the conversation. Direct-to-film printing has moved from a niche technique to one of the most practical decoration methods for small and mid-sized shops, and for good reason. It handles complex artwork that vinyl cannot touch, and it does it without the setup costs that come with screen printing. This guide walks through what the process actually involves, where it makes sense, and the details that separate a clean print from a peeling mess.
What DTF Printing Actually Is
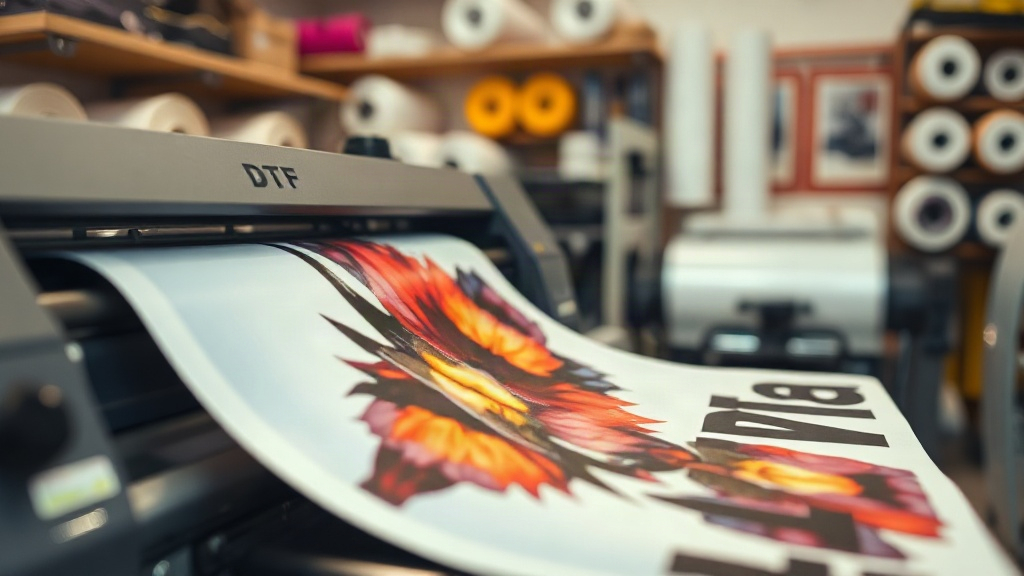
The name describes the process well enough: a printer deposits ink onto a special film rather than directly onto fabric. From there, the film goes through a powdering step and a curing step before it ever touches a garment. Only at the end does heat and pressure transfer the design onto the shirt.
That indirect route is the whole point. Because the ink sits on a film first, the printer is not fighting with fabric texture, stretch, or thickness. It can lay down white ink as a base, then build color on top, which is what makes bright designs possible on dark garments. A DTF print on a black cotton tee can hold vivid yellow, orange, and light blue without the washed-out look that plagues other methods.
The Four Stages of the Process
- Printing: A DTF printer lays down CMYK inks plus a white layer onto a PET film. The white layer matters because it acts as an opaque backing, letting colors pop on any fabric color.
- Powdering: While the ink is still wet, thermoplastic polyurethane powder is applied across the print. The excess gets shaken off, leaving powder only where there is ink.
- Curing: The powdered film passes through a heat source, usually a curing oven or a heat press, until the powder melts and bonds with the ink. This is the step that determines durability.
- Transferring: The cured film is placed on the garment and pressed at a specific temperature and time. After cooling, the film peels away, leaving the design behind.
Each stage has its own variables, and skipping shortcuts in any of them tends to show up later as cracking, fading, or peeling after a few washes.
Why DTF Has Gained So Much Ground
Compare it to the two methods most shops already know, and the appeal becomes obvious.
Against Heat Transfer Vinyl
Vinyl requires weeding, which means cutting away excess material by hand or with a machine. For a three-color logo, that is three separate layers, three presses, and three chances to misalign. DTF transfers arrive as a single sheet. One press, one pass, done. For anyone who has spent an evening weeding tiny letters out of adhesive film, that difference alone justifies the switch.
Against Screen Printing
Screen printing still wins on large runs. If you are producing 500 identical shirts, the per-unit cost is hard to beat. But screens require setup, one per color, and that setup cost has to be absorbed somewhere. For runs under 50 pieces, or for designs with photographic detail and gradients, DTF is often the more sensible choice. There are no screens to burn, no color separation, and no minimum order to justify the effort.
Against Direct-to-Garment
Direct-to-garment printing requires pretreating the shirt and works best on 100% cotton. It also struggles with dark fabrics. DTF sidesteps both problems. It adheres to cotton, polyester, blends, and even canvas or denim, and the white ink base means dark garments are no harder than light ones.
Fabric Compatibility and Real-World Limits
One of the most common questions from newcomers is whether DTF works on everything. The honest answer is that it works on far more materials than most methods, but not without caveats.
- Cotton and blends: Excellent results. The powder adhesive grips natural fibers well.
- Polyester: Works, but lower pressing temperatures are important. Too much heat can cause dye migration, where the garment's color bleeds up through the print.
- Nylon and treated fabrics: Possible, but adhesion can be inconsistent. Testing is essential before committing to a full order.
- Stretch fabrics: The cured ink film has some flexibility, but heavy stretch combined with a thick ink layer can lead to cracking over time.
Dye migration deserves special attention because it catches people off guard. A bright red polyester jersey pressed at too high a temperature can turn a white design pink within days. Using a low-bleed film or lowering the press temperature solves most of these cases, but the lesson is to always run a test piece before a production run.
Common Mistakes That Ruin Prints
Most failures trace back to a handful of recurring errors, and nearly all of them are preventable.
Under-Curing the Powder
If the powder does not fully melt, the print will feel gritty and will not survive washing. The film should look slightly glossy after curing, not matte and sandy. A curing oven with consistent temperature control removes the guesswork that comes with pressing film to cure it.
Pressing at the Wrong Temperature
Every film and powder combination has a recommended range. Going hotter to speed things up usually backfires, causing scorching, dye migration, or a film that sticks to the garment and will not peel cleanly.
Peeling While Hot
This is the classic beginner error. The transfer needs to cool before the film is removed. Peeling warm can distort fine lines and stretch the ink, leaving a blurred edge.
Ignoring Moisture in the Garment
Fabric that has absorbed humidity needs a pre-press to drive out moisture. Skipping it traps steam under the transfer, which shows up as bubbles or weak adhesion.
Getting Started Without Overspending
The barrier to entry has dropped considerably. A few years ago, a DTF setup meant a significant investment. Today, smaller printers and ready-to-press transfer sheets make it possible to test the method before committing to equipment. Many shops start by ordering pre-printed transfers, learning the pressing side of the process first, and only then deciding whether in-house printing makes financial sense.
That staged approach has real value. Pressing is where most quality problems originate, and it is far cheaper to master temperature, pressure, and timing on purchased transfers than on your own printed film. Once the pressing workflow is consistent, bringing printing in-house becomes a straightforward capacity decision rather than a leap of faith.
Frequently Asked Questions
How long does a DTF print last on a shirt?
A properly cured and pressed transfer typically holds up for the life of the garment when washed inside out in cold water and dried on low heat. High heat in the dryer is the main enemy, since it gradually breaks down the adhesive bond.
Can I use DTF on 100% polyester without dye migration?
Yes, provided you press at a lower temperature and use a low-bleed film or a barrier layer. Testing on a scrap piece of the same fabric is the only reliable way to confirm before running a full order.
Do I need a special printer to make DTF transfers?
You need a printer designed for DTF, which includes white ink channels and a powder application and curing setup. Standard desktop inkjet printers cannot produce transfers that hold up to washing.
Is DTF cheaper than screen printing?
For small runs and multi-color designs, yes. Screen printing becomes more economical once you are producing large quantities of the same design, because the per-unit cost drops as the run grows.
What temperature should I press DTF transfers at?
Most films recommend somewhere between 300 and 325 degrees Fahrenheit for 10 to 15 seconds with medium pressure, but the exact numbers depend on the film and powder you use. Always follow the manufacturer's specification rather than a generic setting.